“The more you read, the more things you will know. The more that you learn, the more places you’ll go.” Dr. Seuss
Oh! How I love to travel! I highly encourage everyone who is young and able to travel as far as they can and explore the world as much as they can!!! Travelling for me was life changing, and my experience living away from my home country and family did give me a new perspective in life altogether… but lets reserve that on a different blog post!
Let’s focus on our primary travel essential document: The Passport
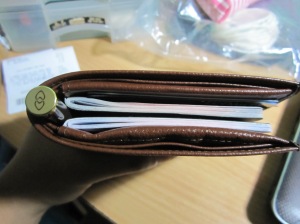
My passport is one of great value to me, and the stamps on them validates it even more. So I do my best to keep it safe especially when traveling. I have bad experiences with my previews passport holders, especially those plastic transparent ones you get at national bookstore. Those tend to do the job in covering it up, but it is so sticky! I do not recommend those especially when you know you are crossing immigration, because immigration officers do not like it (a valid excuse) when you have a cover on your passport when they scan it. Plus they tend to get yellow and disgusting over time. Lesson learned! Now, for my passport, I use a Hickok Leather Passport Cover.
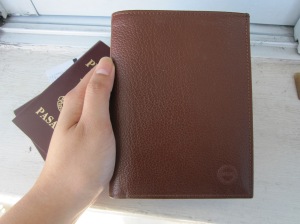
Leather Cover : from plastic to leather.. (Wow! Big girl! ikaw na!) It may feel like its to luxurious to be using leather, but trust me, in the long run, it will be worth it.
- Leather age gracefully, it gets character when scratched, and maintenance is easy.
- Leather is organic and it reduces the need to constantly buy those plastic ones that tend to break overtime. It grows and age with you, when it is time to retire your leather cover, cut it up into bits, soak it in water to remove the oils and throw it in the compost bin. Or just keep it and let it hold your old passports.
- Leather does not flake. fake leather tends to flake especially when exposed to extreme weathers (snow, dessert, humidity, etc.) leaving all the contents in your bag with specks of it… such a hassle to clean up!
- Leather is easy to maintain… a small amount of leather cleaner can go a long way. Alternatively, I use a bit of lotion (any kind will do) and rub it in with my fingers then wipe it with a paper towel! Viola! Clean and conditioned!
- Light weight leather. Get one that is not heavy or too stiff. I have a cowhide leather material and it is soft and light.
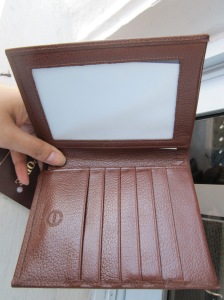
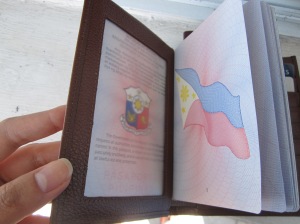
Pocket Sleeves : Sleeves are our friend, they can keep a coin, a ticket stub, credit card and Miles reward cards. This one in particular have 6 card holders, and 2 big Pockets to hold your passport. The big pocket has a plastic window for easy identification. It is also easy to slide the passport in and out of the sleeves for Immigration SOP purposes.
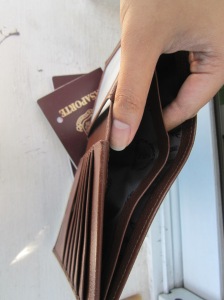
Money Holder: It has 2 compartments for money. I like that it has 2, one for your Peso and one for your destination’s currency. I make sure I have enough Philippine Peso in there for the terminal fee, and food allowance in case I get hungry while in the departure lounge. Also, I keep a small amount of dollars in there just in case I would need it for food or cab when I get to my destination. The size of these compartments can handle various sizes of bills. 210mm x 135mm to be exact.
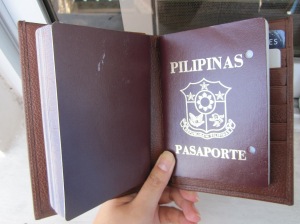
To summarize it all:
Pros:
- Leather material is long lasting, elegant and stylish
- Lightweight and soft
- Organic
- Has Pockets
- Passport can slide in and out easily
- This one in particular can fit 2 to 3 passports and a pen conveniently.
- Easy to maintain
- Available in 2 colors (black and tan)
Cons:
- Expensive. Prices can range from Php 400 – Php 1,200
- Requires a bit of maintenance
- I wish I can have them embossed with my initials
Recommended for:
- Frequent travelers
- Gifts (for Mom, Dad, bro, sis, Boyfriend, Girlfriend, Best friend, Husband, Wife, Graduation Gift)
- OFWs
I realized (finally) that entering countries have a standard process, and my new passport holder can now help me through those immigration SOP. Overall, I am happy with my Leather Cover, and I did tested it out on my previous travel before I did a review. This item was purchased using my own money.
to lu luu!! XOXO


